GCSE Photography
Composition
|
Here you will find all of your lessons and homework. You will be expected to catch up at home if you miss anything, so please do so independently.
|

|
Create a new powerpoint and put all of this work on one document called 'Composition_Your_name'
Task One: What is Composition?

The following images show different composition techniques. Can you guess which is which?
Rule of Thirds... Symmetry.... Leading Lines... Framing... Negative Space
Rule of Thirds... Symmetry.... Leading Lines... Framing... Negative Space


Composition basically means layout.
Good composition is a massive part of taking a good photo!
Good composition is a massive part of taking a good photo!


Your Task
Create a 'Do's and Dont's' Fact sheet on composition. Put all of the information onto just ONE slide!
Include:
- What is composition?
- Why is it important in photography?
- Give examples of different types of composition
Answer the questions above in full sentences using your research, make sure you include photo examples.
Think about your presentation... You might like to start with the template below - don't forget to add photos though! Click the example to download.

Homework
Please complete the powerpoint slide for homework due next Wednesday if you didn't get it finished in today's lesson.
Please complete the powerpoint slide for homework due next Wednesday if you didn't get it finished in today's lesson.
Task Two: Leading Lines?


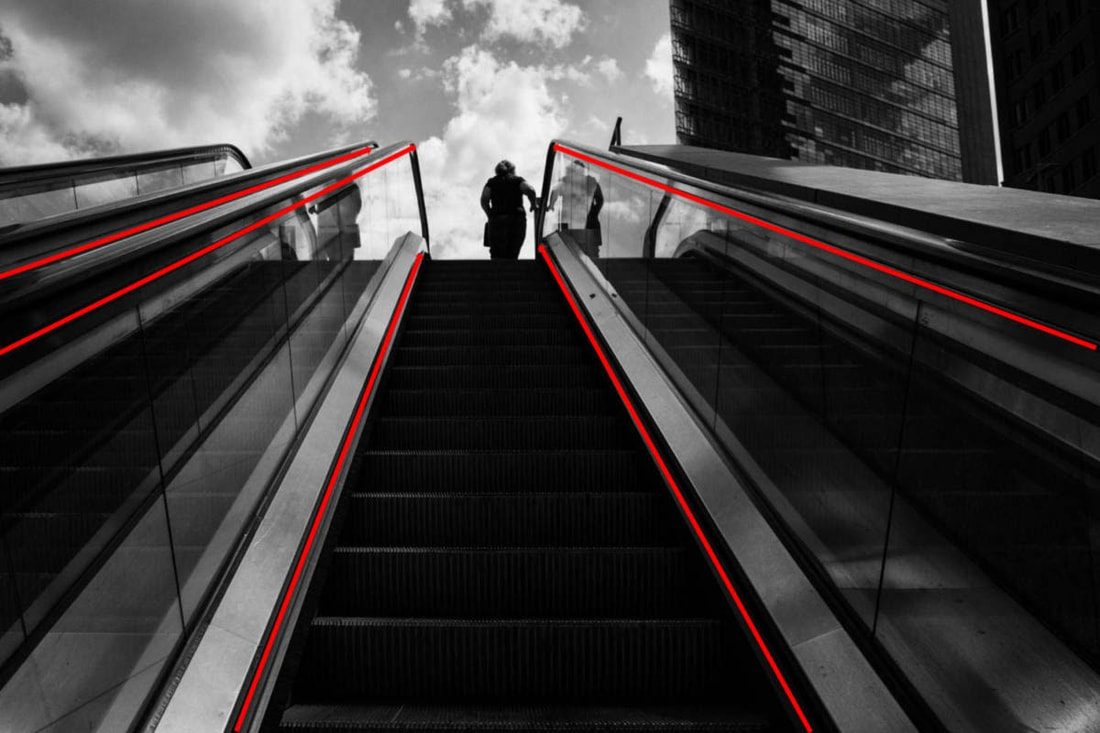
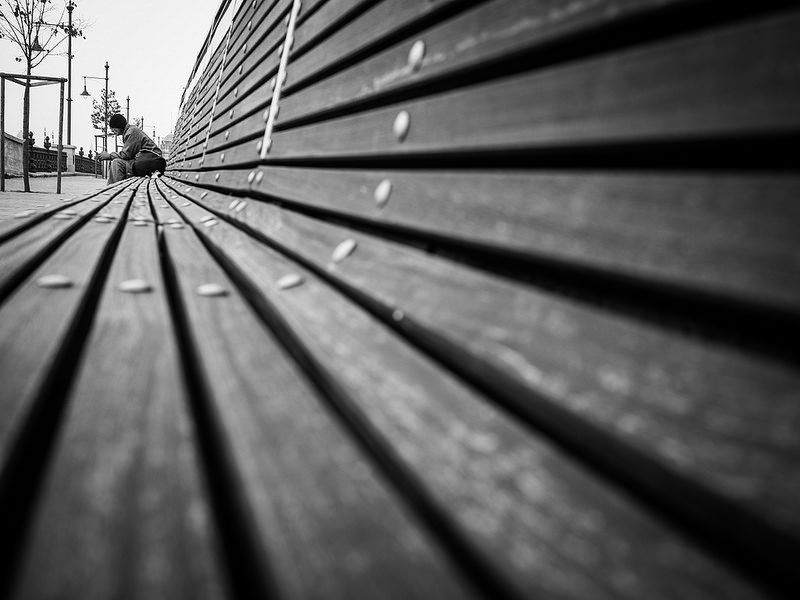
Composition: Leading Lines
Leading lines are lines that appear in a photograph that have been framed and positioned by the photographer to draw the viewer's eye towards a specific point of interest. These lines often draw the viewer’s eye in a specific direction or towards a designated portion of the photograph.
|

|
|

|

Task 1
Use the links below to research leading lines and how to use them.
write up on your powerpoint everything you can find about using leading lines.
write up on your powerpoint everything you can find about using leading lines.
|
|
|
|
|
Task 2
On the next slide of your powerpoint.
Use a thick red line tool to draw over the main leading lines in each photo to demonstrate your understanding.
Use a thick red line tool to draw over the main leading lines in each photo to demonstrate your understanding.


Your task
Take 20 creative photographs that feature leading lines to demonstrate what you have learnt about line in photography.


Homework: Take another 10 photos of leading lines in different locations. Try to include:
Landscapes
A street
People
Stairs
Objects
Plus any other ideas you have! You might like to recreate some of the photos you found when researching.
Add them to your powerpoint.
A street
People
Stairs
Objects
Plus any other ideas you have! You might like to recreate some of the photos you found when researching.
Add them to your powerpoint.


Edit different photos from your leading lines photoshoot in the following ways:
1. Desaturate the colour (make it black and white) - go to image, adjustments, desaturate.
2. On a different photo, alter the brightness and contrast to make it bold. go to image, adjustments, brightness and contrast.
3. On another photo, alter the colour completely by changing the hue. Go to image, adjustments, hue and saturation.
To save your images, go to EXPORT then select JPEG. Then rename the files appropriately.
Task Three: Negative Space


|
Recap: What is composition? What are leading lines? |

Composition: Negative Space
Negative space is the area surrounding the main subject in a photograph which is left unoccupied. Put simply, it is the space around the object itself that helps draw attention to the main focus.


Your task
Take 10 photos around the school, using negative space to draw attention to the main thing in your photographs.
When you are finished, upload your photos to powerpoint (title 'Negative Space')
When you are finished, upload your photos to powerpoint (title 'Negative Space')

Your task
complete the following sentences:
Negative space is...
I have demonstrated my understanding of negative space by..
I think my strongest photograph is... because...
I will use this composition technique in future to...
Negative space is...
I have demonstrated my understanding of negative space by..
I think my strongest photograph is... because...
I will use this composition technique in future to...
Homework: Take another 20 photos featuring negative space in different locations. Try to include:
Landscapes
Buildings
People
Objects
Plus any other ideas you have! You might like to recreate some of the photos you found when researching.
Upload to teams assignment before next lesson. There is also a quick quiz to do on Teams please - it'll only take 5 minutes!
Buildings
People
Objects
Plus any other ideas you have! You might like to recreate some of the photos you found when researching.
Upload to teams assignment before next lesson. There is also a quick quiz to do on Teams please - it'll only take 5 minutes!

Create an edit of your best photo using curves - see below.
upload it to your powerpoint on the correct slide.
|
Select your most interesting photo from your negative space photoshoot.
Open it in Photopea, then edit it to make it black and white and high contrast so that it is more striking. 1. Go to image, adjustments, desaturate 2. Adjust the contrast using Curves. Drag the line around to alter the highlights and shadows. Try to make your photo dramatic. Paste this photo onto the next slide of your negative space powerpoint. Present it next to the original so that you can see the before and after. |

|
Task Four: Cropping rule of thirds


|
Log into teams to read your feedback on the leading lines task. |

Composition: Rule of Thirds
The rule of thirds is a compositional guideline that breaks an image down into thirds (both horizontally and vertically) so you have nine pieces and four gridlines.
To use it effectively, the photographer should place the main subject matter on one of the areas where the guidelines cross.
To use it effectively, the photographer should place the main subject matter on one of the areas where the guidelines cross.
Which photo uses rule of thirds below?


photoshoot task. take 10+ photos in school that demonstrate Rule of thirds then identify the technique by using red lines like the image below


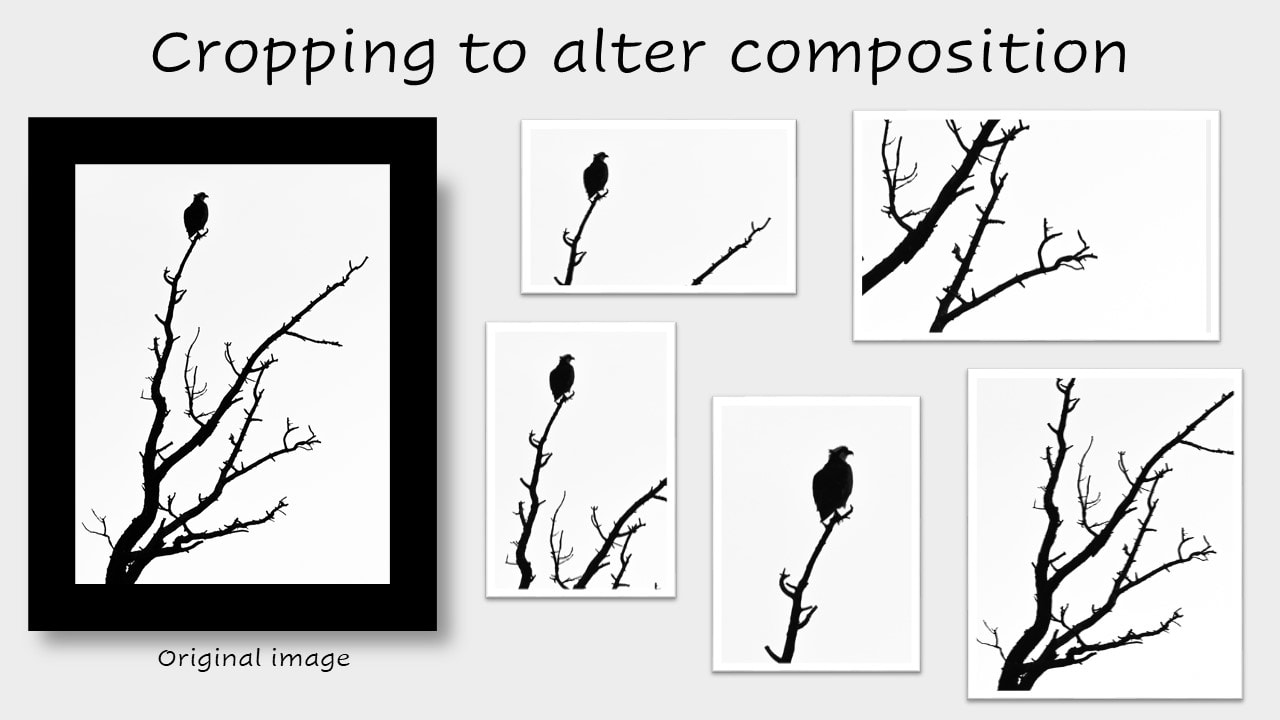
Editing task 2: Cropping
Crop your edited photograph 3 or more times, each time pasting it onto the same slide of a powerpoint to show different compositions like the example below. At least one of these must be Rule of Thirds.
Complete these sentences to review the task, on a new slide:
Rule of thirds is...
I have edited my photo by...
I have used the crop tool to...
Key words to use:
COMPOSITION... ALTERNATIVE... RULE OF THIRDS... NEGATIVE SPACE... FOCAL POINT... SUBJECT MATTER
Rule of thirds is...
I have edited my photo by...
I have used the crop tool to...
Key words to use:
COMPOSITION... ALTERNATIVE... RULE OF THIRDS... NEGATIVE SPACE... FOCAL POINT... SUBJECT MATTER
Task Four: Symmetry

Log into teams to read your feedback on the previous task. Respond to your missions.

Composition: symmetry
In photography symmetry appears when parts of your composition mirror other parts.
It is created when two halves of your scene look the same and balance each other out. Symmetry defines something being clean, proportional and balanced and will make pictures appear neat, tidy and clinical.
It is created when two halves of your scene look the same and balance each other out. Symmetry defines something being clean, proportional and balanced and will make pictures appear neat, tidy and clinical.
find a selection of interesting examples of symmetrical photography. add these to your powerpoint.


photoshoot task. take 10+ photos in school that are symmetrical, within the following categories:
the human figure
architecture
nature
objects
upload your photos to your powerpoint.

Homework
take 20 more photos that demonstrate symmetry, including some within the categories above, but they can be of anything you wish. it would be great to see some reflections in mirrors or water!
upload them to your powerpoint.
take 20 more photos that demonstrate symmetry, including some within the categories above, but they can be of anything you wish. it would be great to see some reflections in mirrors or water!
upload them to your powerpoint.
Assessment: What have you learnt about composition?
write 200-300 words about what you have learnt through these tasks (on the last slide of your powerpoint).
Demonstrate your understanding with clear examples. you may refer back to any of your work to help you with this.
Ensure that SPAG is correct.
Demonstrate your understanding with clear examples. you may refer back to any of your work to help you with this.
Ensure that SPAG is correct.
